Looking for a great Halloween activity without the horror? You’ve come to the right place!
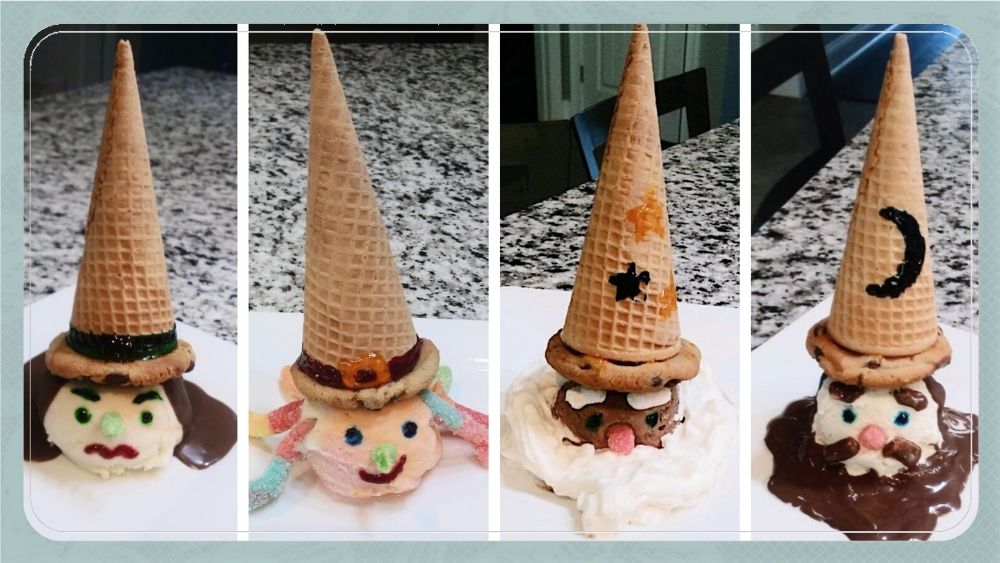
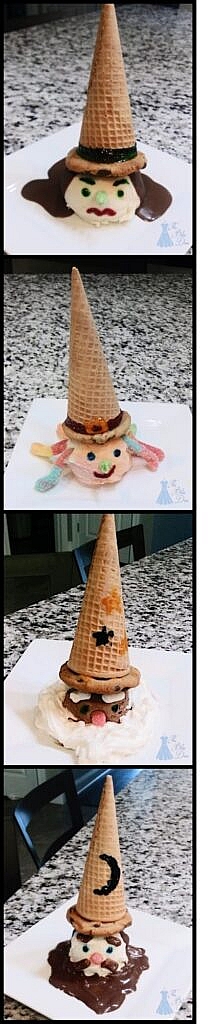
Inspired by the Baskin Robbins clown cones I adored as a child, these witches and wizards are the perfect desserts to serve during the spooky season! I made a colorful good witch, a classic evil witch, and two different wizards. This post will explain how to make them!
*This post contains affiliate links. You can see our disclosure policy here.
How to Make Ice Cream Witches
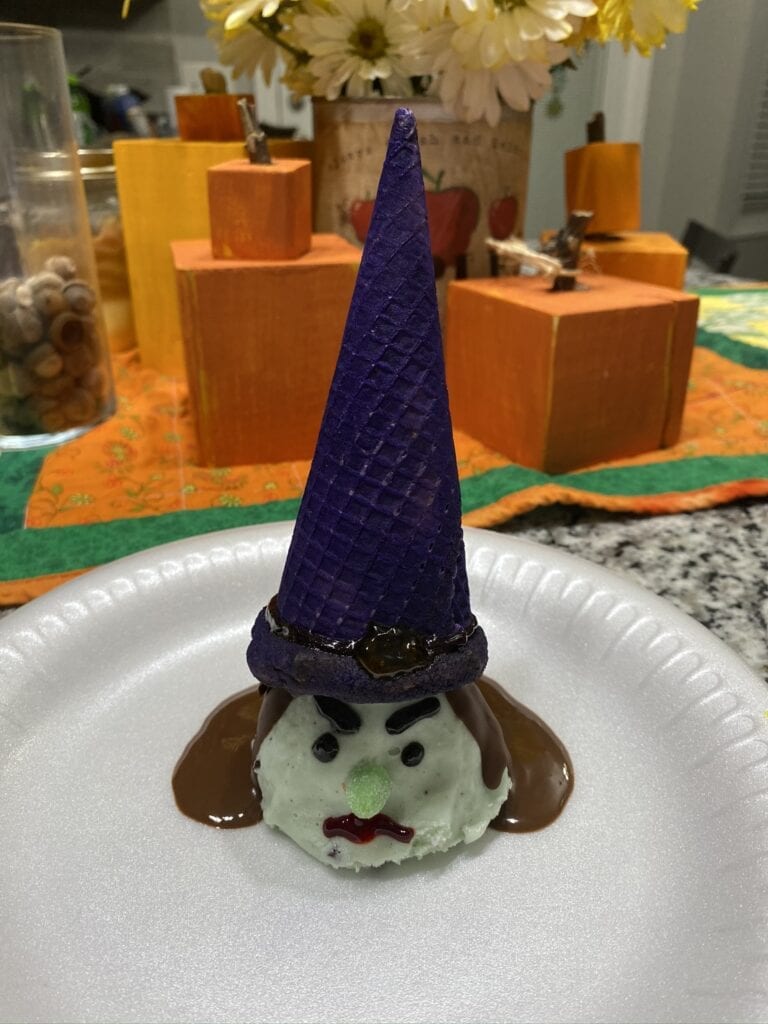
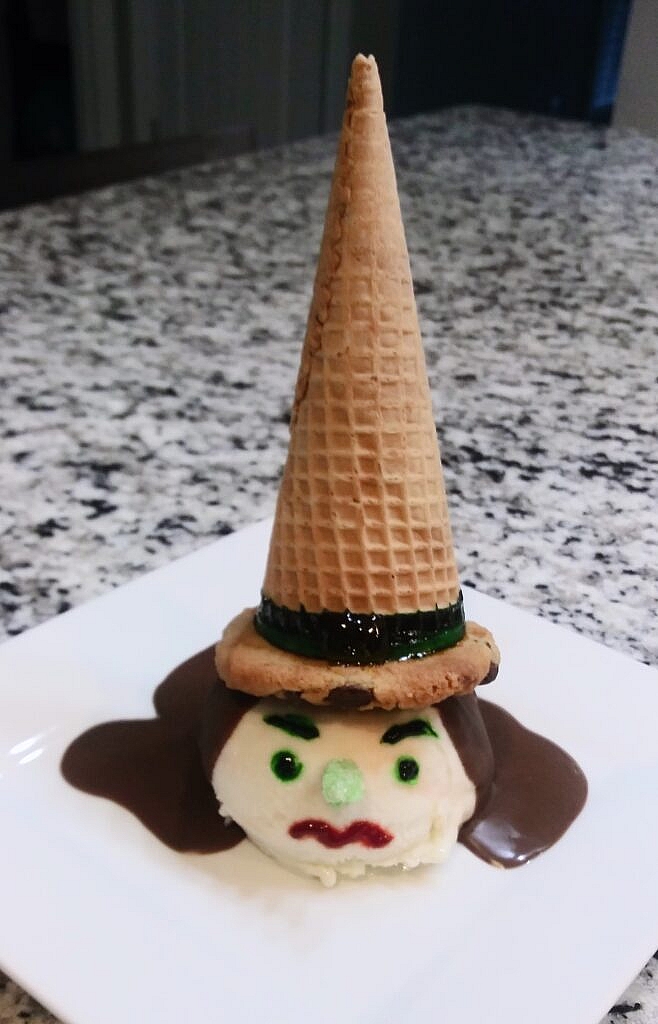
Evil Witch
Makes about 12 witches
You’ll Need:
- Wax or parchment paper
- Three cookie sheets
- Ice cream scoop
- One 48 fl oz tub green ice cream (Key Lime or Pistachio. Mint chocolate chip doesn’t look as clean) *
- Chocolate shell ice cream topping (7.25 oz bottle)
- Green and red gel food coloring tubes
- Chocolate chip cookie dough (16 oz package, or 24 ready to bake cookies)
- Sugar cones (12 ct.)
- 12 green gummy worm (I used the sour kind)
- Kitchen scissors
- 12 small plates for serving
- edible food coloring spray (optional)
- toothpicks (optional)
Note: If you make all 12 witches at once, you are going to need a lot of empty freezer space!
Steps to Make an Ice Cream Witch
- Line two cookie sheets with wax or parchment paper. On the first sheet, scoop six large balls of ice cream and place them a couple of inches apart on the parchment paper. Repeat on second cookie sheet.
- Freeze the ice cream scoops for 2-3 hours. DO NOT SKIP THIS STEP or your witches will be melted before you even make the face!
- Bake 12 cookies on the third cookie sheet according to package directions. Once golden brown and removed from the oven, flatten the cookies tops with a spatula. Eat the rest of the cookie dough (or you know, bake them first) or save the other twelve cookies for backup in case a cookie breaks or you get hungry.
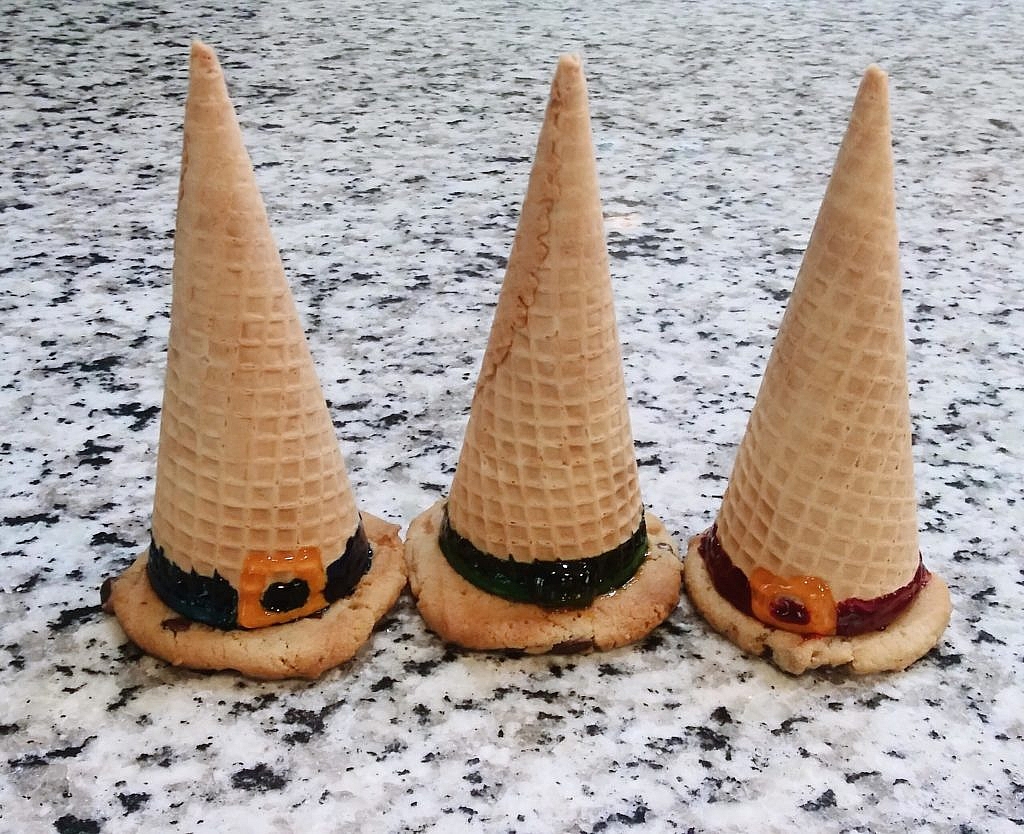
- Once cooled, it is time to make the witch hat. If you’d like to color your hat, spray it with your choice of edible food coloring spray. Then, using the gel food coloring, draw a buckle and trim on the wide part of the sugar cone. I used all green to make the hat dark and creepy-looking, but you can use yellow to brighten up the buckle. Use any color you want for the trim!
- Squirt a healthy layer of gel around the wide bottom of the sugar cone, then place in the middle of a cookie. Should look like a witch hat!
- Using kitchen scissors, cut a triangle nose from the green end of the gummy worm. Make sure the part where it attaches to the face is cut too, so it’ll stick better.
- Remove one ice cream ball from the freezer and put it on a plate. Use the chocolate shell to drizzle “hair” on the ice cream. Go slowly for more control, and remember to leave room for the face! Attach the witch hat to the top before the chocolate hardens, or add a little extra shell to the bottom of the hat to help secure it to the ice cream head.
- Insert the witch nose (the gummy triangle) in the middle of the face.
- Draw eyebrows, eyes, and a mouth using the gel food coloring. A toothpick may come in handy to help guide the gel where you want it.
- Immediately return plate to freezer until serving time.
- Repeat steps 4-10 until you’ve made all your witches!
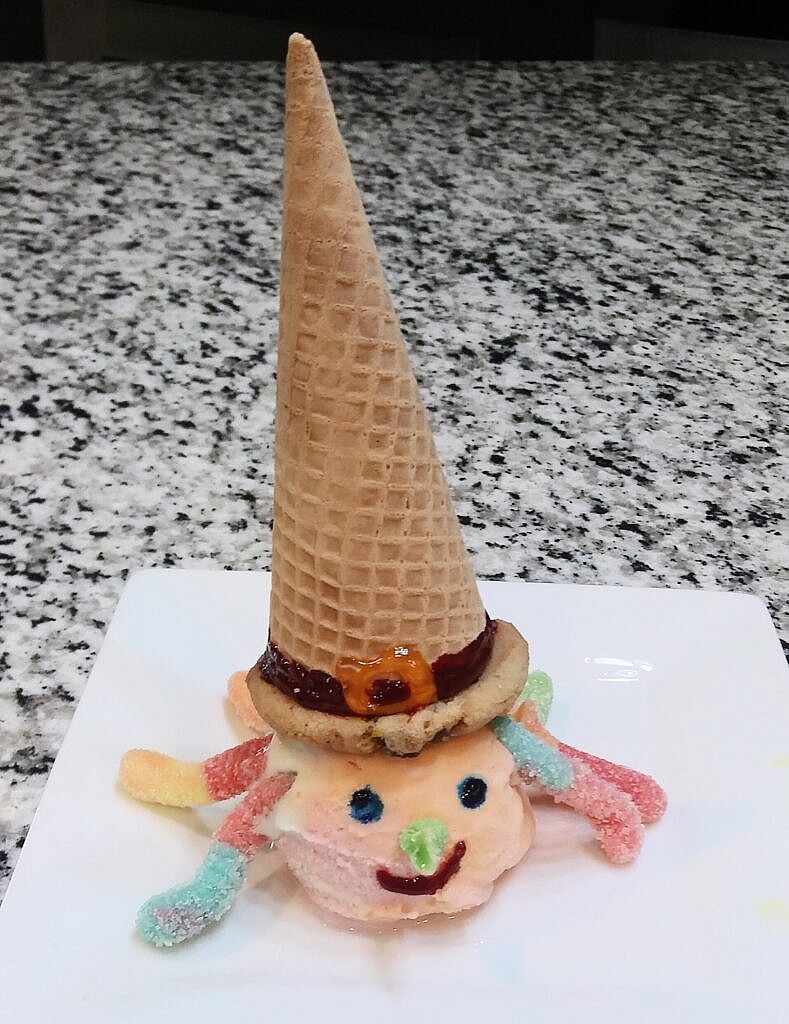
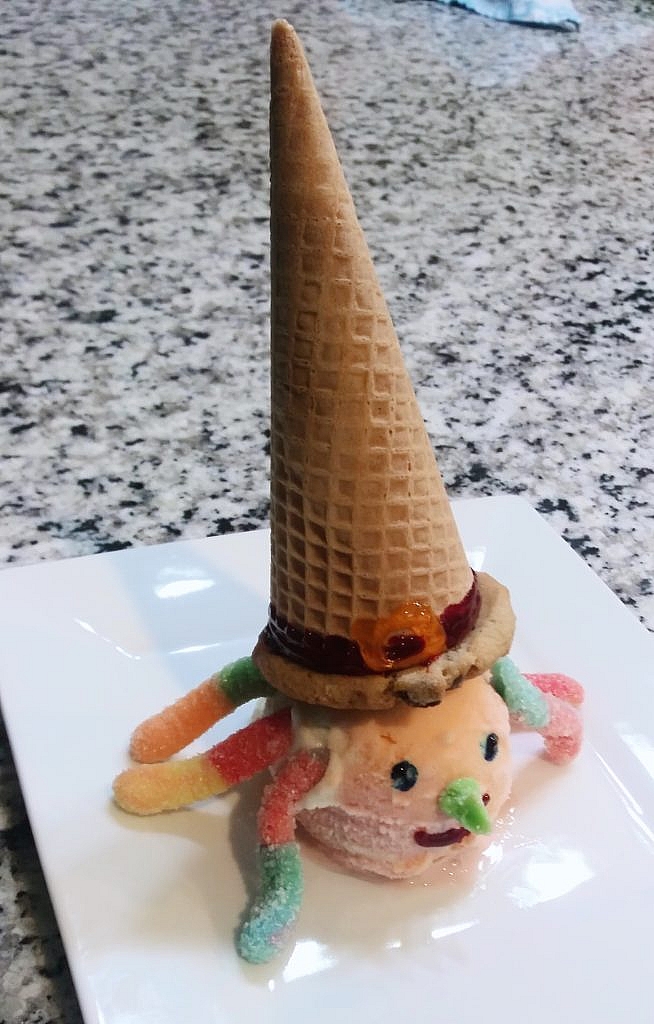
Good Witch

Makes about 12 witches
You’ll Need:
- Wax or parchment paper
- Three cookie sheets
- One 48 fl oz tub rainbow sherbet
- Gel food coloring tubes (I used blue, red, and yellow)
- Chocolate chip cookie dough (16 oz package, or 24 ready to bake cookies)
- Sugar cones (12 ct.)
- 2 7.5 oz packages sour gummy worms
- Kitchen scissors
- 12 small plates for serving
- edible food coloring spray (optional)
- toothpicks (optional)
Note: If you make all 12 witches at once, you are going to need a lot of empty freezer space!
- Line two cookie sheets with wax or parchment paper. On the first sheet, scoop six large balls of ice cream and place them a couple of inches apart on the parchment paper. Repeat on second cookie sheet.
- Freeze the ice cream scoops for 2-3 hours. DO NOT SKIP THIS STEP or your witches will be melted before you even make the face!
- Bake 12 cookies on the 3rd cookie sheet according to package directions. Once golden brown and removed from the oven, flatten the cookies tops with a spatula. Eat the rest of the cookie dough (or you know, bake them first) or save the other twelve cookies for backup in case a cookie breaks or you get hungry.
- Once cooled, it is time to make the witch hat. If you’d like to color your hat, spray it with your choice of edible food coloring spray. Then using the gel food coloring, draw a buckle and trim on the wide part of the sugar cone. Use any color you want!
- Squirt a healthy layer of gel around the wide bottom of the sugar cone, then place in the middle of a cookie. Should look like a witch hat!
- Using kitchen scissors, cut a triangle nose from the green end of a gummy worm. Make sure the part where it attaches to the face is cut too, so it’ll stick better.
- Cut one tip off the end of six gummy worms. (Again, this helps it stick to the ice cream better)
- Remove one ice cream ball from the freezer and put it on a plate. Leaving a little space on the top, press the sticky, cut end of the gummy worms into the ice cream for hair (I did 3 on each side). Remember to leave room for the face! Carefully press the witch hat on the top of the head.
- Insert the witch nose (the gummy triangle) in the middle of the face.
- Draw eyes, and a mouth using the gel food coloring. A toothpick may come in handy to help guide the gel where you want it.
- Immediately return plate to freezer until serving time.
- Repeat steps 4-10 until you’ve made all your witches!
I had a blast making these with my kids.

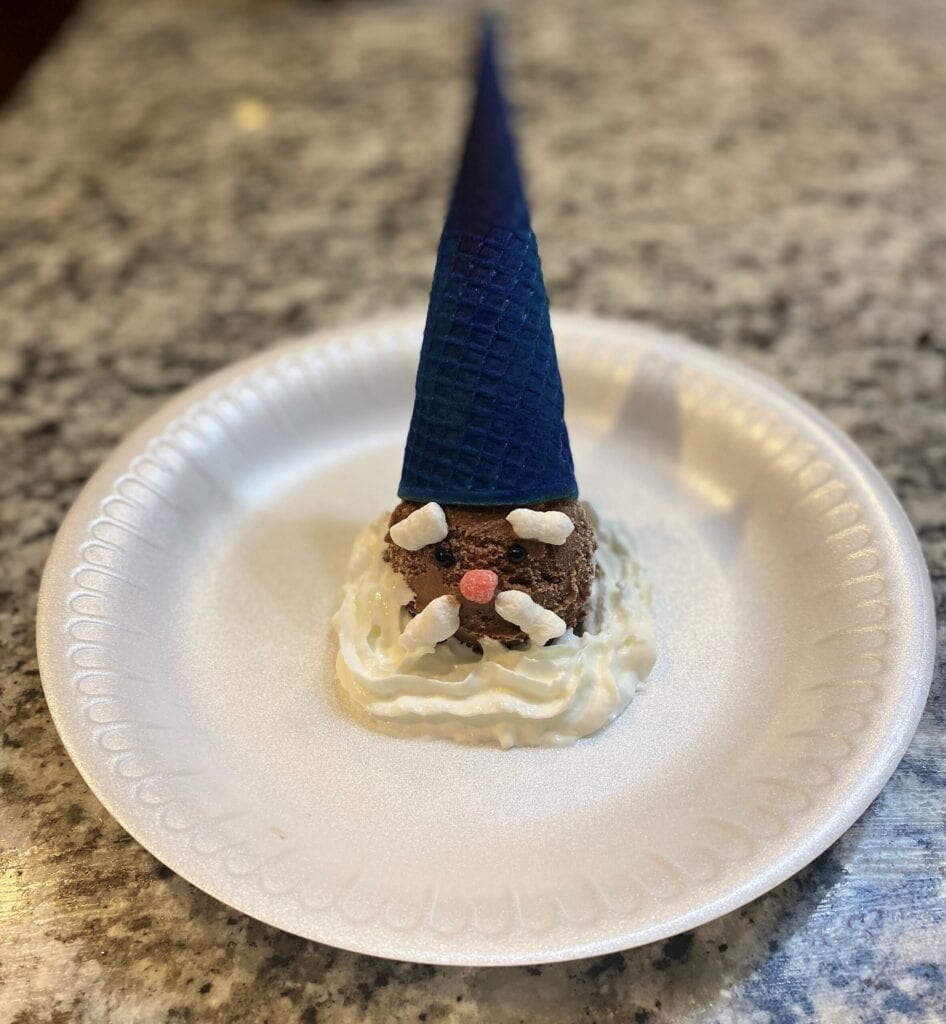
How to Make Ice Cream Wizards
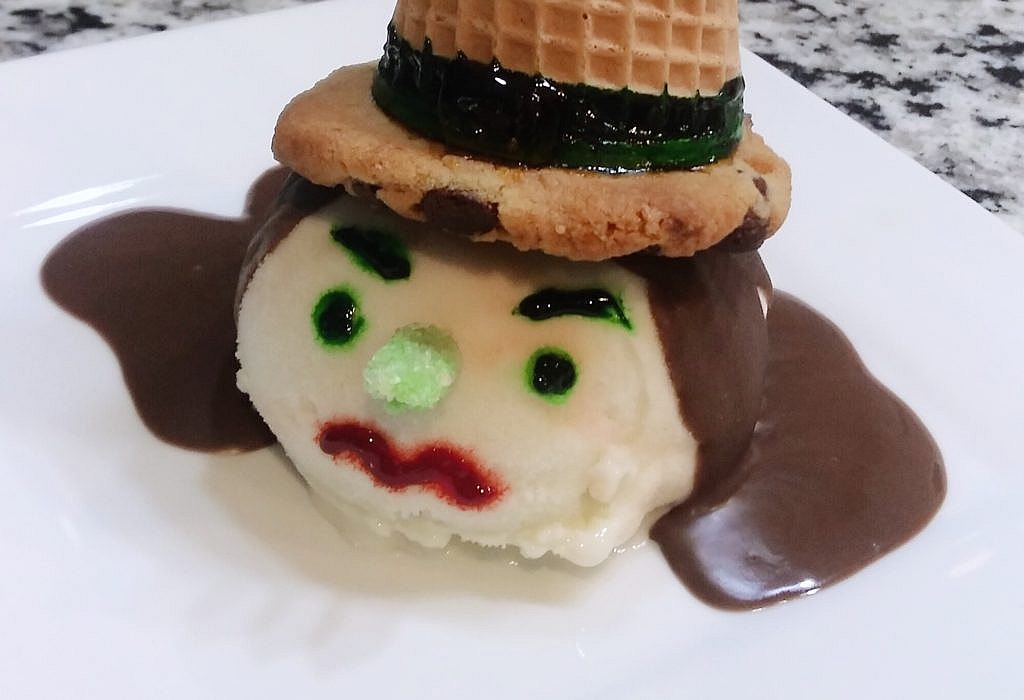
Old Wizard
Makes about 12 wizards
You’ll Need:
- Wax or parchment paper
- Three cookie sheets
- One 48 fl oz tub chocolate ice cream
- Green, blue, and yellow gel food coloring tubes
- Chocolate chip cookie dough (16 oz package, or 24 ready to bake cookies)
- Sugar cones (12 ct.)
- 12 pink or red gummy worms
- 12 mini marshmallows
- 1 big can Reddi Whip
- Kitchen scissors
- 12 small plates for serving
- edible food coloring spray (optional)
- toothpicks (optional)
Note: If you make all 12 wizards at once, you are going to need a lot of empty freezer space!
- Line two cookie sheets with wax or parchment paper. On the first sheet, scoop six large balls of ice cream and place them a couple of inches apart on the parchment paper. Repeat on second cookie sheet.
- Freeze the ice cream scoops for 2-3 hours. DO NOT SKIP THIS STEP or your wizards will melt before you even make the face!
- Bake 12 cookies on the third cookie sheet according to package directions. Once golden brown and removed from the oven, flatten the cookies tops with a spatula. Eat the rest of the cookie dough (or you know, bake them first) or save the other twelve cookies for backup in case a cookie breaks or you get hungry.
- Once cooled, it is time to make the wizard hat. If you’d like to color your hat, spray it with your choice of edible food coloring spray. Then using any color gel food coloring, draw moons and stars on a sugar cone. (You can also buy star sprinkles and attach those with a bit of gel.)
- Squirt a healthy layer of gel around the wide bottom of the sugar cone, then place in the middle of a cookie.
- Using kitchen scissors, cut the end from a gummy worm for the nose. Then cut a mini marshmallow into four strips.
- Remove one ice cream ball from the freezer and put it on a plate.
- Insert the nose in the middle of the face. Add two marshmallow strips for eyebrows and use the other two to make a mustache.
- Draw eyes using the gel food coloring. A toothpick may come in handy to help guide the gel where you want it.
- Squirt whipped cream on the top, back, and sides for wizard hair. Carefully add more cream in the front to make the beard.
- Gently press the wizard hat on top.
- Immediately return plate to freezer until serving time.
- Repeat steps 4-11 until you’ve made all your wizards!
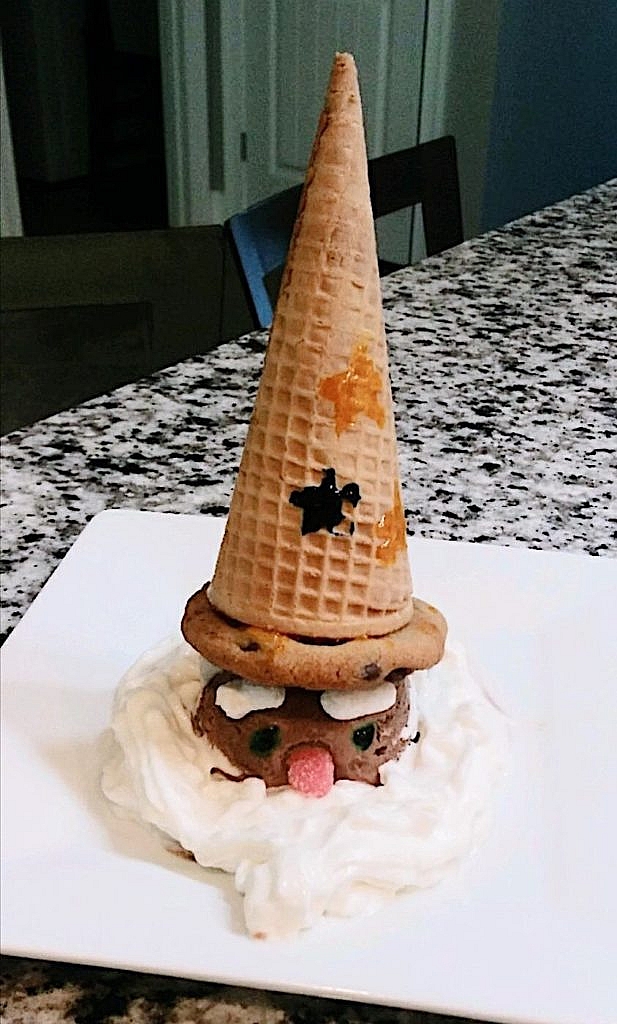
Younger Wizard

Makes about 12 wizards
You’ll Need:
- Wax or parchment paper
- Three cookie sheets
- One 48 fl oz tub vanilla ice cream
- Chocolate shell ice cream topping (7.25 oz bottle)
- Green, blue, and yellow gel food coloring tubes
- Chocolate chip cookie dough (16 oz package, or 24 ready to bake cookies)
- Sugar cones (12 ct.)
- 12 pink or red gummy worms
- 12 mini tootsie rolls
- Kitchen scissors
- 12 small plates for serving
- edible food coloring spray (optional)
- toothpicks (optional)
Note: If you make all 12 wizards at once, you are going to need a lot of empty freezer space!
- Line two cookie sheets with wax or parchment paper. On the first sheet, scoop six large balls of ice cream and place them a couple of inches apart on the parchment paper. Repeat on second cookie sheet.
- Freeze the ice cream scoops for 2-3 hours. DO NOT SKIP THIS STEP or your wizards will melt before you even make the face!
- Bake 12 cookies on the third cookie sheet according to package directions. Once golden brown and removed from the oven, flatten the cookies tops with a spatula. Eat the rest of the cookie dough (or you know, bake them first) or save the other twelve cookies for backup in case a cookie breaks or you get hungry.
- Once cooled, it is time to make the wizard hat. If you’d like to color your hat, spray it with your choice of edible food coloring spray. Then using any color gel food coloring, draw moons and stars on a sugar cone. (You can also buy star sprinkles and attach those with a bit of gel.)
- Squirt a healthy layer of gel around the wide bottom of the sugar cone, then place in the middle of a cookie.
- Using kitchen scissors, cut the end from a gummy worm for the nose. Then cut a four strips out of a tootsie roll for eyebrows and a mustache.
- Remove one ice cream ball from the freezer and put it on a plate. . Use the chocolate shell to drizzle “hair” on the ice cream. Go slowly for more control, and remember to leave room for the face! Attach the wizard hat to the top before the chocolate hardens, or add a little extra shell to the bottom of the hat to help secure it to the ice cream head.
- Insert the nose in the middle of the face. Add two tootsie roll strips for eyebrows and use the other tootsie roll strips to make a mustache.
- Draw eyes using the gel food coloring. A toothpick may come in handy to help guide the gel where you want it.
- Slowly drizzle chocolate shell around the front of the face to make a beard.
- Immediately return plate to freezer until serving time.
- Repeat steps 4-11 until you’ve made all your wizards!
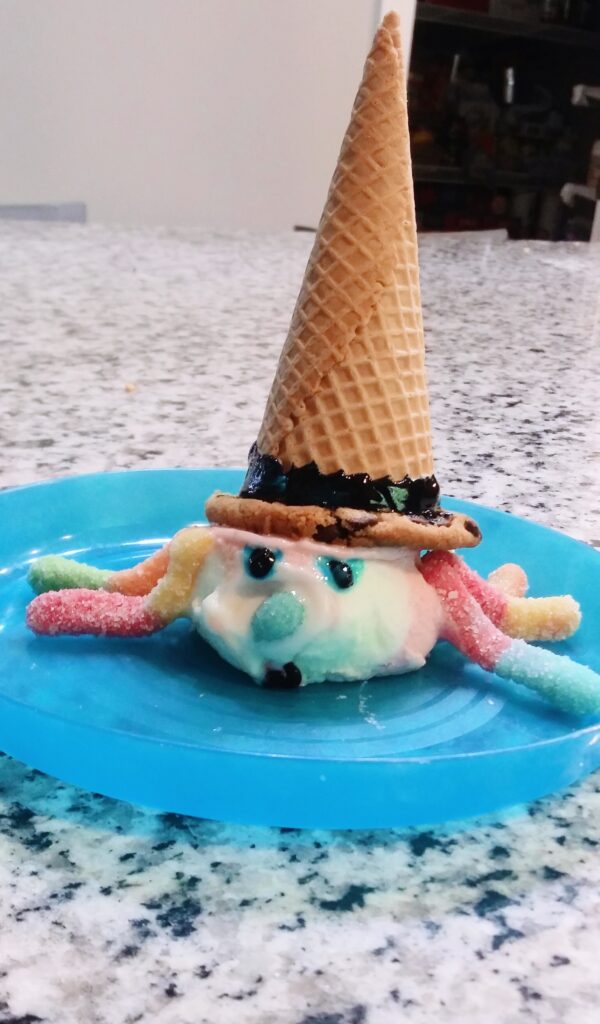
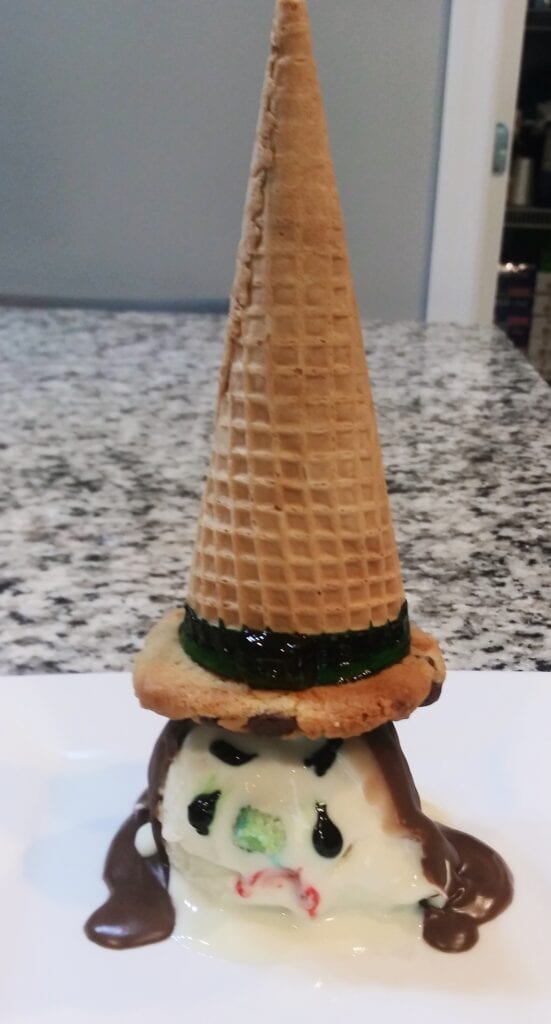
Melting Witch/A.K.A. Fails
Thank you Becca, Tara, and Maegan for sharing your wisdom about freezing the ice cream first. Here’s what happens if you skip steps 1 & 2 🙂
Want more Halloween activity ideas? Check out the link below!
-Mariah
Please pin and share with your friends!

Trackbacks/Pingbacks